
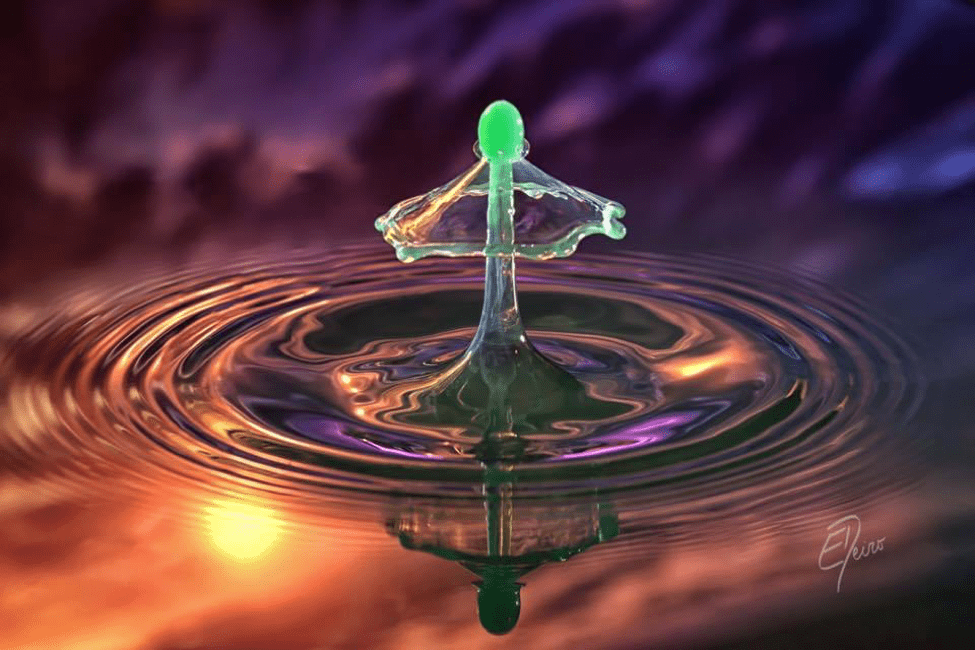
One of the most beautiful pictures we have come across is that of water in its various forms. This natural element has the tendency to come out in different ways when photographed, and they are nothing short of amazing. From the splash mode to single droplet pictures, there is almost no form in which water does not look its absolute best.
If you have always envied the photographers who can get water to pose for them, so to speak, we have developed this guide to help you take the best shots of water too. Here, we take advantage of a combination of the Pluto Trigger and Pluto Valve in unison.
Things You’ll Need
To take the perfect shots, you will need a combination of the tools below:
- A camera of choice
- Speedlite flash
- Tripod
- Magic arm (for holding the valve)
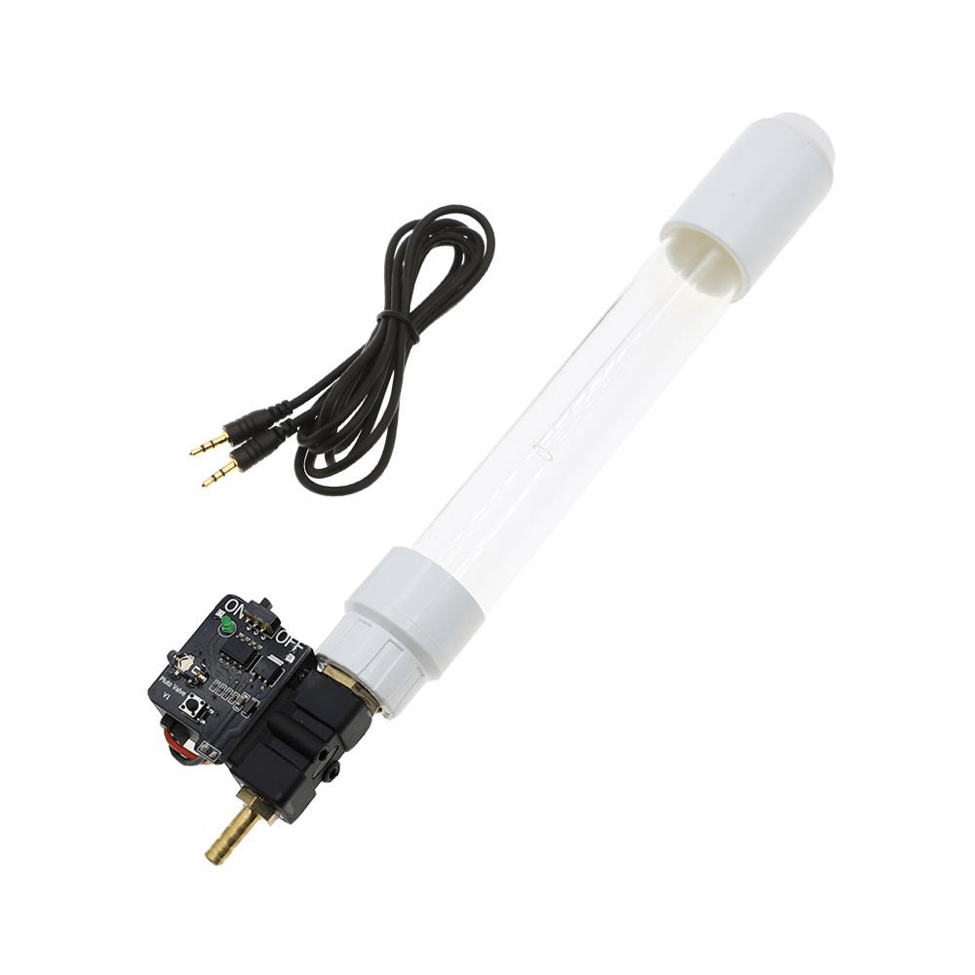
- Pluto Valve Kit
Steps
Now, let’s get to shooting the best pic of water
Step 1 – Darkened Room
Since water is transparent, you don’t want too much light passing through it lest the whole purpose of the shoot be defeated.
Thus, make sure the shoot will be done in a darkened room. That will provide the needed contrast against the water, and make your shot focused on the droplet in question. However, the room should not be completely dark, just darkened enough.
Step 2 – Prepare the Valve and Tube
The tube is filled with enough water that it gets to the bottom of the small tube and no more. The small tube is inserted into the big tube and pressed tight for better constant pressure within the system.
The Pluto Valve is setup with the water-filled tube, and its control button can now be pushed to purge water from the small tube. Make sure this control button is not depressed for long to prevent battery overheating from extended pressure.
Step 3 – Prepare your camera
Depending on your needs, set the frame and adjust the focus of your camera accordingly. The best way to make such focus assumptions will be to put an object where the water droplet is supposed to be, allowing for a better gauge of the kind of effects that you want around the final image.
The shutter speed is kept at between 1-2 seconds and the Drive Mode is in IR Remote.
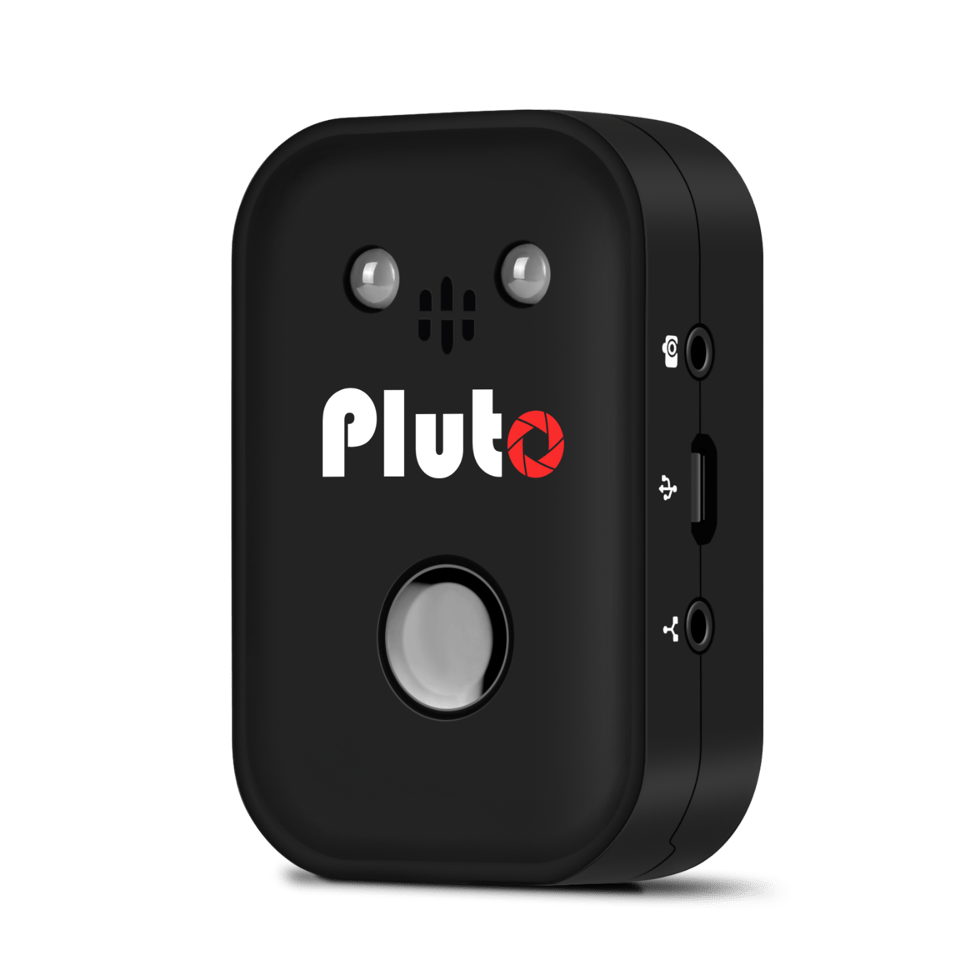
Step 4 – Prepare Pluto Trigger
Connect the Pluto Trigger to your camera setup, flash inclusive. This way, you can launch the trigger and use it to enable your camera modes.
On the settings menu of the Pluto Trigger, select ‘Droplet’ as a preconfigured setting to better your capture. Test the trigger by releasing some water droplets and activating the camera remotely.
Step 5 – Final Steps
Calibrate the remote camera shutter settings to allow for droplet collision captures. Likewise, set the flash delay and intervals in such a way that the water is captured when it hits the other body of water below, and as the splash rises till it gets to the highest level. The intervals will allow you get a burst of pictures from which you can then choose the best shot.